


Video calling apps have become an essential part of our lives. They allow us to stay connected with friends and family from all over the world, and for businesses, they have become a vital tool to stay productive and exchange information across distributed teams.
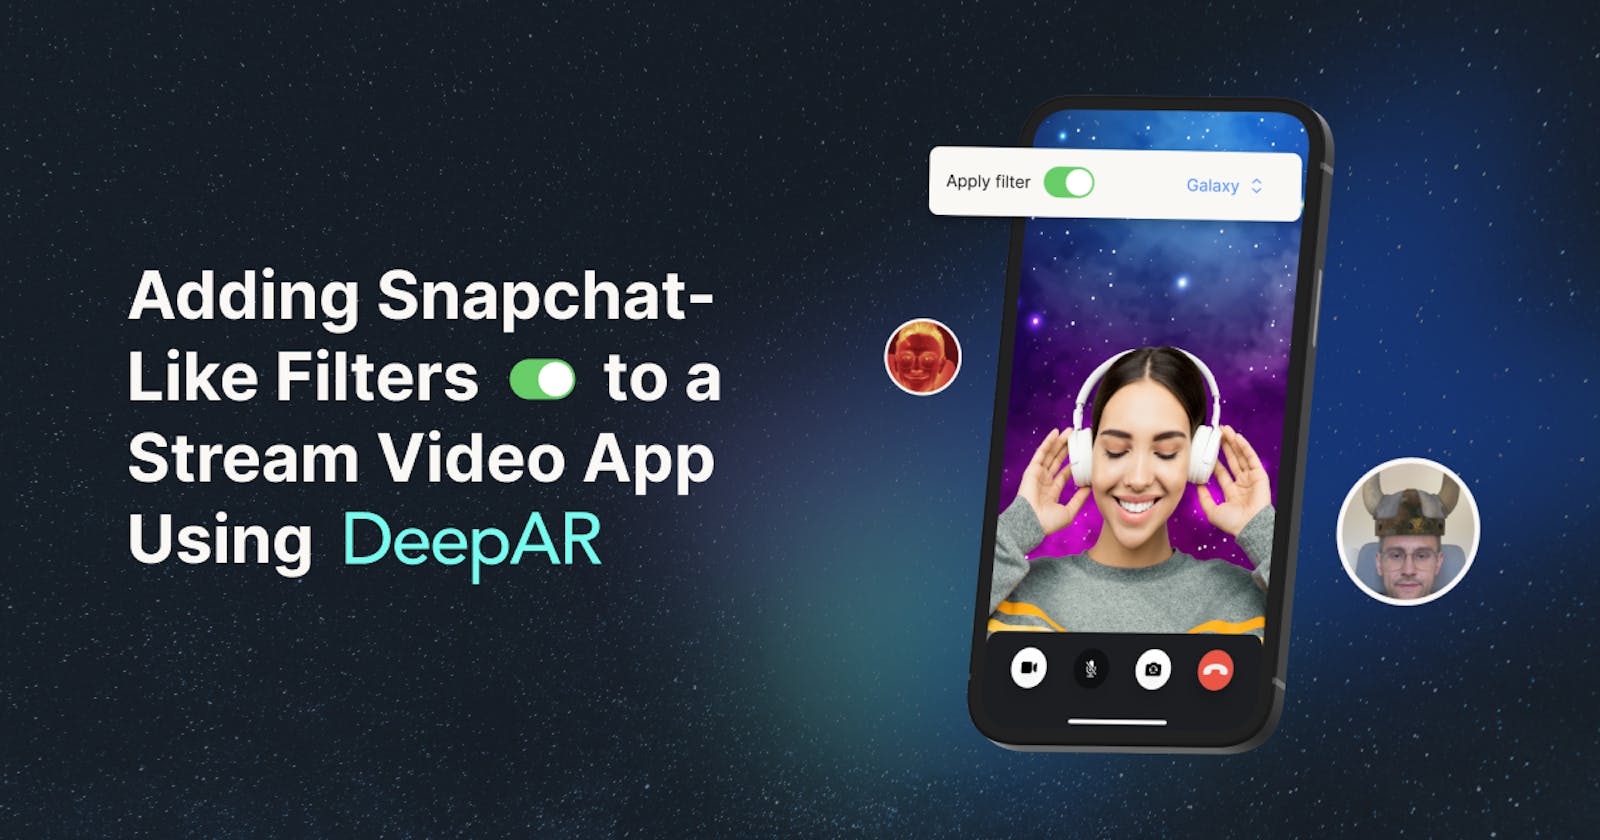
Snapchat, TikTok, Instagram, and Messenger have shown the power that video filters have to enhance the calling experience, making calls more engaging and fun. Examples of these are background blurring, face retouching, background images, or even adding AR objects and effects, such as glasses, and googly eyes, amongst others. We want to show how you can combine Stream with DeepAR to bring this power to your iOS app using SwiftUI.
Video filters provide multiple benefits: They add a layer of creativity for users to express themselves in playful ways. They give video calls a more personal touch, despite the distance. They give your app a competitive edge that can attract users and boost their satisfaction by providing features they won’t find elsewhere. They increase the time users spend on calls and will result in higher engagement metrics.
Integrating video filters with your video calling app improves the user experience and the reputation of your app. That’s why we want to demonstrate how to add them to a Stream Video-powered application using SwiftUI on iOS with the help of the amazing services that DeepAR offers.

Before We Get Started
Before diving into the implementation, we’ll quickly explain how the setup works conceptually. During video calls, each participant’s camera captures a video signal from their device and streams that to a server. The server distributes these signals to the other participants, and everyone can see everyone else inside of the call.
The way we can add filters and effects is to intercept the video signal from the camera itself. The Stream Video SDK gives us a way to receive each frame of the camera before it is sent to the server. We use the DeepAR services to process that frame, add the filter, and then forward it to the server. There is no additional processing necessary server-side; it all happens directly on-device.
1. Set Up a New Project with Stream Video
Let’s get started by setting up a new Xcode project using SwiftUI. Open up Xcode and go to File → New → Project.
Select iOS → App and click Next. Give it your favorite name and make sure SwiftUI is selected for Interface and Swift for the Language option. Save it somewhere on your machine.
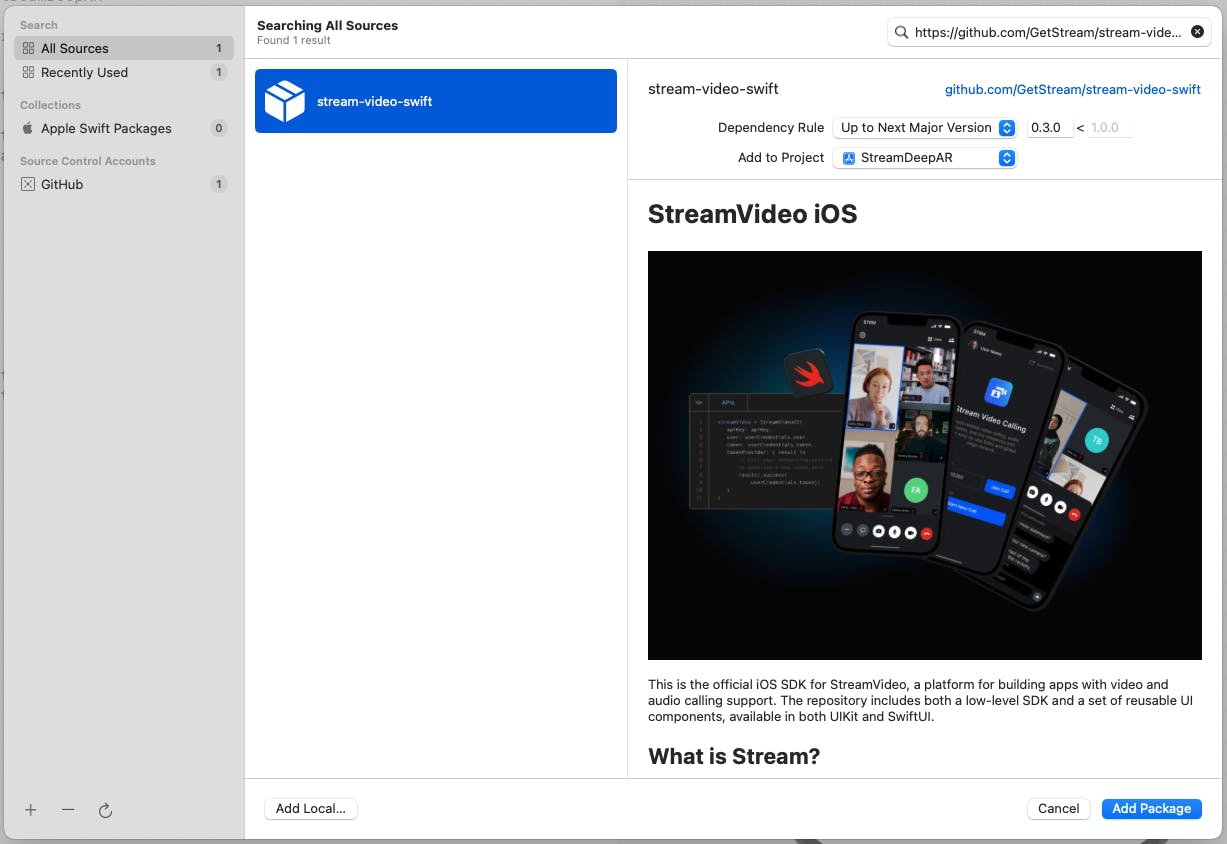
We have the project set up and can now add the dependency for StreamVideo. Go to File → Add Packages and paste the following URL to search for the package:
https://github.com/GetStream/stream-video-swift
Select Up to Next Major Version for Dependency Rule and hit Add Package, as shown in the screenshot below. Make sure to select both StreamVideo and StreamVideoSwiftUI as Package Products.
After waiting for the package loading to finish, we’re ready to go.
Next, we must create a project in the Stream dashboard to obtain an API key to initialize the SDK correctly.
We’ll provide an example key in the code snippet below, but we encourage you to set up and code along in your own project. It’s free to get started with Stream.
Once we’ve set up the project, we can return to Xcode. One more step we need to take before initializing the Video SDK is to set up a user.
Create a new Swift file called UserCredentials and create a struct with the same name inside of it:
struct UserCredentials {
    let user: User
    let token: UserToken
}
In a production app, we’d want a proper user creation and login flow. To demonstrate the functionality quickly, we’ll create a demoUser. Jump back into the file and add the following extension to UserCredentials with a static property:
extension UserCredentials {
    static let demoUser = UserCredentials(
        user: User(
            id: "testuser",
            name: "Test User",
            imageURL: URL(string: "https://vignette.wikia.nocookie.net/starwars/images/2/20/LukeTLJ.jpg")!,
            customData: [:]
        ),
        token: UserToken(rawValue: "<your-token>")
    )
}
Note: If you’re using your own project, you must set up the user beforehand in the Dashboard. In the sample project, we have prepared this for you.
Now, we can finally initialize the Stream Video SDK. Go to your app’s entry file, which is the name of your project with the suffix App (e.g. CrazyFiltersApp if your project is called CrazyFilters).
We need to add three things to the file:
Add a
@Stateproperty of typeStreamVideoUI?to keep track of the initialized SDKCreate a function called
setupStreamVideothat takes care of the initializationCall the function when the app starts using the
.onAppearmodifier
Here’s the code to add to your App struct:
// 1. Add the @State property
@State var streamVideo: StreamVideoUI?

// 2. Create the setup function
private func setupStreamVideo(
    with apiKey: String,
    userCredentials: UserCredentials
) {
    streamVideo = StreamVideoUI(
        apiKey: apiKey,
        user: userCredentials.user,
        token: userCredentials.token,
        tokenProvider: { result in
            // Call your networking service to generate a new token here.
            // When finished, call the result handler with either .success or .failure.
            result(.success(userCredentials.token))
        }
    )
}

var body: some Scene {
    WindowGroup {
        ContentView()
            .onAppear {
        // 3. Call the setup function in .onAppear
setupStreamVideo(with: "mcux5wpckxrz", userCredentials: .demoUser)
            }
    }
}
Note that in the .onAppear modifier, we’re using the API key and the demoUser we previously created to initialize the SDK.
Last, we’ll create a fundamental UI to initialize a call. Open ContentView and replace its content with the following code (we’ll explain what we do here afterward):
struct ContentView: View {

    @Injected(\.streamVideo) var streamVideo

    @StateObject var callViewModel = CallViewModel()
    @State var callId = ""

    var body: some View {
        VStack {
            TextField("Insert a call id", text: $callId)
                .textFieldStyle(.roundedBorder)
                .padding()

            Button {
                resignFirstResponder()
                callViewModel.startCall(
                    callType: "default",
                    callId: callId,
                    members: [/* Your list of participants goes here. */]
                )
            } label: {
                Text("Start a call")
            }
        }
        .padding()
        .modifier(CallModifier(viewModel: callViewModel))
    }
}
Notice how we added a few properties to the ContentView:
A reference to the
streamVideoobject (using the Dependency Injection mechanism of the Stream Video package)The
CallViewModelis our helper class to interact with the SDKA
callIdthat the user can enter in aTextFieldto initiate a call
The UI consists of a TextField and a Button, which then calls the startCall function of the callViewModel with the given callId.
The last modifier is where things get more interesting. We add the CallModifier with the callViewModel, and that’s all we need to do to have full video-calling functionality. We’ve managed to achieve this with relatively little code.
Now that we’ve added video calling let’s add filters.
2. Prepare the Video Filter
As mentioned, we’ll use the extraordinary services of DeepAR to add fantastic-looking filters to our app. To work with their services, we need to have two things:
Several filters that we want to add to the application
An account with DeepAR combined with a project created on the DeepAR dashboard (we need a license key to initialize the SDK)
For the first point, you can just copy the folder from the finished project that we have on GitHub (feel free to give it a ⭐️ while you’re there). You can copy over the Effects folder into your project (make sure: Copy items if needed is enabled). These are just a few we selected for the context of a video call, but you can add other ones by creating them using DeepAR Studio.
Setting up an account is best explained by the DeepAR people themselves in steps 1 and 2 of this guide. Once you’ve set up a project, on its overview page, you can click Add App in the iOS App section (see the red arrow in the screenshot below).
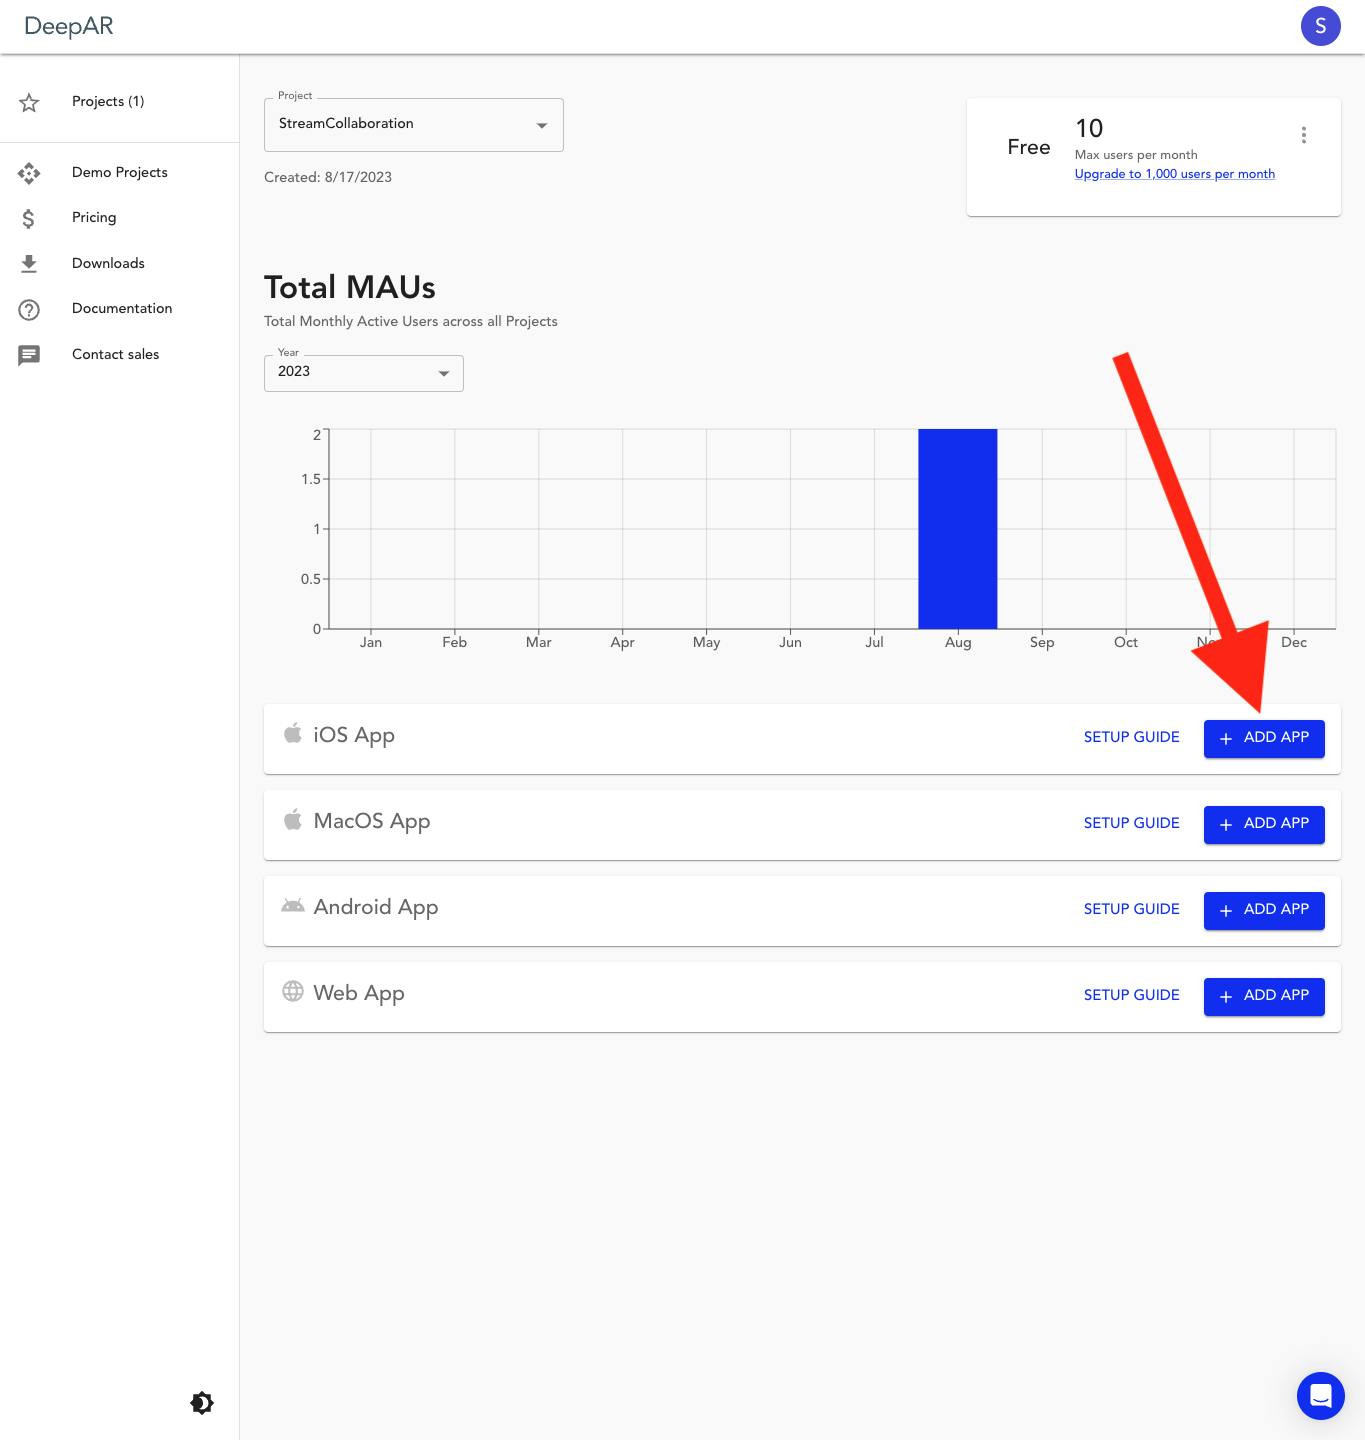
Enter the bundle ID of your Xcode project, and when you’re done, make sure you see the COPY SDK KEY button (we’ll need it in a bit).
With the setup done, we can put this into our code. Before we apply things directly, we’ll prepare an enum with all the effects we copied into our project in the previous step.
Create a new file called Effect and add this content to it:
enum Effect: String, CaseIterable {
    case EmotionMeter = "Emotion_Meter"
    case EmotionsExaggerator = "Emotions_Exaggerator"
    case FireEffect = "Fire_Effect"
    case FlowerFace = "flower_face"
    case GalaxyBackground = "galaxy_background"
    case Hope = "Hope"
    case MakeupLook = "MakeupLook"
    case NeonDevilHorns = "Neon_Devil_Horns"
    case PingPong = "Ping_Pong"
    case PixelHearts = "Pixel_Hearts"
    case RayBan = "ray-ban-wayfarer"
    case Snail = "Snail"
    case SplitViewLook = "Split_View_Look"
    case Stallone = "Stallone"
    case VendettaMask = "Vendetta_Mask"
    case VikingHelmet = "viking_helmet"


    var path: String? {
        return Bundle.main.path(forResource: self.rawValue, ofType: "deepar")
    }
}
We’ve added the path property because we’ll need to load the DeepAR effects from the file system.
With that, we can add an ObservableObject acting as our view model to cleanly separate the UI from the logic. Create a new Swift file called FiltersService.
We’ll fill it up step by step, so let’s first create the skeleton for it:
import SwiftUI
import StreamVideo
import DeepAR
import CoreImage


@MainActor
class FiltersService: NSObject, ObservableObject {}
This needs to run on the main thread because it makes changes to the UI. Therefore we added the @MainActor property wrapper.
We need a few properties:
filtersActive: abooleanindicating whether filters are active or notselectedEffect: the currently selectedEffectinitialized to one of theenumcasesdeepAR: aDeepARobject that is our contact point for the DeepAR SDKdeepARFilter: the Stream Video SDK allows you to simply addVideoFilterobjects to the video streamcurrentProcessedImage: the latestCIImageobject that we have processed and put into the video stream
Add these properties to the FiltersService:
@Published var filtersActive = false
@Published var selectedEffect: Effect = Effect.allCases.first!
private var deepAR: DeepAR!
var deepARFilter: VideoFilter!
var currentProcessedImage: CIImage?
Next, we need to initialize the properties in the init function of the FiltersService, so let’s add it:
override init() {
    super.init()

    // Initialize DeepAR with a license key
    self.deepAR = DeepAR()
    self.deepAR.setLicenseKey("<add-you-license-key")
    self.deepAR.delegate = self

    // We handle rendering ourselves, so set the live mode to false
    self.deepAR.changeLiveMode(false)
    deepARFilter = createDeepARFilter(deepAR: self.deepAR)
}
Insert the license key (from the DeepAR dashboard, using the COPY SDK KEY button). We must conform to the DeepARDelegate for the code to work. Let’s add an extension to FiltersService where we do that:
extension FiltersService: DeepARDelegate {
    func frameAvailable(_ sampleBuffer: CMSampleBuffer!) {
guard let pixelBuffer = CMSampleBufferGetImageBuffer(sampleBuffer) else { return }            let image = CIImage(cvPixelBuffer: pixelBuffer)
let mirroredImage = image.transformed(
by: CGAffineTransform(-1, 0, 0, 1, image.extent.width, 0)
)
self.currentProcessedImage = mirroredImage.oriented(.left)
    }
}
Whenever a new frame is available after being processed by the DeepAR SDK, we’ll set it to the currentProcessedImage. However, we’re not using this processed image yet.
Let’s add the second missing thing, the createDeepARFilter function. Before that, let’s take a moment to explain what it is. We already mentioned that we can create VideoFilter objects that can be used to manipulate the video stream. It allows us to intercept each stream frame, apply some processing to it, and return it to the Stream Video SDK.
To do this, we’ll add the following code to the FiltersService:
func createDeepARFilter(deepAR: DeepAR) -> VideoFilter {
    let deepARVideoFilter = VideoFilter(id: "deep", name: "DeepAR") { [weak self] image in
            let rotatedImage = image.oriented(.right)
            if self?.deepAR.renderingInitialized == false {
                self?.deepAR.initializeOffscreen(
                    withWidth: Int(rotatedImage.extent.width),
                    height: Int(rotatedImage.extent.height)
                )


                guard let path = self?.selectedEffect.path else { return rotatedImage }
                self?.deepAR.switchEffect(withSlot: "effect", path: path)
            }

            let pixelBuffer: CVPixelBuffer = rotatedImage.toCVPixelBuffer()
            self?.deepAR.processFrame(pixelBuffer, mirror: true)

            return self?.currentProcessedImage ?? rotatedImage
        }
        return deepARVideoFilter
}
The code creates a new VideoFilter object, which gets handed a closure with a CIImage object. We first check if the deepAR rendering is initialized, and if that’s not the case, we call the initializeOffscreen function and activate the selectedEffect using the switchEffect function.
This won’t compile, as the toCVPixelBuffer function is an extension we must add to the CIImage class. Add the following snippet (which is taken from here) below the FiltersService class:
extension CIImage {
    func toCVPixelBuffer() -> CVPixelBuffer {
        let tmpcontext = CIContext(options: nil)
        let cgImage =  tmpcontext.createCGImage(self, from: self.extent)

        let cfnumPointer = UnsafeMutablePointer<UnsafeRawPointer>.allocate(capacity: 1)
        let cfnum = CFNumberCreate(kCFAllocatorDefault, .intType, cfnumPointer)
        let keys: [CFString] = [kCVPixelBufferCGImageCompatibilityKey, kCVPixelBufferCGBitmapContextCompatibilityKey, kCVPixelBufferBytesPerRowAlignmentKey]
        let values: [CFTypeRef] = [kCFBooleanTrue, kCFBooleanTrue, cfnum!]
        let keysPointer = UnsafeMutablePointer<UnsafeRawPointer?>.allocate(capacity: 1)
        let valuesPointer =  UnsafeMutablePointer<UnsafeRawPointer?>.allocate(capacity: 1)
        keysPointer.initialize(to: keys)
        valuesPointer.initialize(to: values)

        let options = CFDictionaryCreate(kCFAllocatorDefault, keysPointer, valuesPointer, keys.count, nil, nil)
        let width = cgImage!.width
        let height = cgImage!.height

        var pxbuffer: CVPixelBuffer?
        var status = CVPixelBufferCreate(kCFAllocatorDefault, width, height,
                                         kCVPixelFormatType_32BGRA, options, &pxbuffer)
        status = CVPixelBufferLockBaseAddress(pxbuffer!, CVPixelBufferLockFlags(rawValue: 0));

        let bufferAddress = CVPixelBufferGetBaseAddress(pxbuffer!);

        let rgbColorSpace = CGColorSpaceCreateDeviceRGB();
        let bytesperrow = CVPixelBufferGetBytesPerRow(pxbuffer!)
        let context = CGContext(data: bufferAddress,
                                width: width,
                                height: height,
                                bitsPerComponent: 8,
                                bytesPerRow: bytesperrow,
                                space: rgbColorSpace,
                                bitmapInfo: CGImageAlphaInfo.premultipliedFirst.rawValue | CGBitmapInfo.byteOrder32Little.rawValue);
        context?.concatenate(CGAffineTransform(rotationAngle: 0))

        context?.draw(cgImage!, in: CGRect(x:0, y:0, width:CGFloat(width), height:CGFloat(height)));
        status = CVPixelBufferUnlockBaseAddress(pxbuffer!, CVPixelBufferLockFlags(rawValue: 0));
        return pxbuffer!;
    }
}
With that, we’ve set up the manipulation of each frame that the Stream Video SDK gives us. We’re adding it to the processing of the DeepAR SDK and updating the current frame once that’s finished.
Now, we need to hook that up with the UI to activate and change the effects and filters applied.
3. Set Up the UI to Select Filters
To set up the UI, we need to take three steps:
Introduce the
deepARFilterfrom ourFiltersServiceto theStreamVideoUIobject (inside ourAppfile)Create a UI element that allows for the activation of filters and the selection of effects
When we are on a call, add that element to the UI (inside of
ContentView)
Let’s start with our App file and initialize the FiltersService inside of it:
@StateObject var filtersService = FiltersService()
Then, when we initialize the streamVideo object, we add a VideoConfig object with a list of filters we want to add (in our case, only the deepARFilter inside of our filtersService object). Change the code when creating the StreamVideoUI object to this:
streamVideo = StreamVideoUI(
    apiKey: apiKey,
    user: userCredentials.user,
    token: userCredentials.token,
    videoConfig: VideoConfig(videoFilters: [filtersService.deepARFilter]),
    tokenProvider: { result in
        // Call your networking service to generate a new token here.
        // When finished, call the result handler with either .success or .failure.
        result(.success(userCredentials.token))
    }
)
Finally, we’ll add the filtersService as a parameter to the ContentView, so please change its initialization to:
ContentView(filtersService: filtersService)
To activate filters in general and select between the different effects, we create a new SwiftUI view and call it FiltersPicker. This consists of two elements:
A
Toggleto activate/deactivate filters in generalA
Pickerthat allows the user to select the effect they want to apply
Wrapping that in an HStack and giving it a background will make it look decent. Here’s the code for the View:
struct FiltersPicker: View {

    @ObservedObject var viewModel: CallViewModel
    @ObservedObject var filtersService: FiltersService

    var body: some View {
        HStack {
            Toggle("Apply filter", isOn: $filtersService.filtersActive)
                .onChange(of: filtersService.filtersActive, perform: { newValue in
                    if newValue {
                        viewModel.setVideoFilter(filtersService.deepARFilter)
                    } else {
                        viewModel.setVideoFilter(nil)
                    }
                })
            Spacer()

            if filtersService.filtersActive {
                Picker("Select a filter", selection: $filtersService.selectedEffect) {
                    ForEach(Effect.allCases, id: \.self) { effect in
                        Text(effect.rawValue)
                    }
                }
                .pickerStyle(.menu)
            }
        }
        .padding()
        .background(
            .thinMaterial,
            in: RoundedRectangle(cornerRadius: 10, style: .continuous)
        )
        .padding(.horizontal)
    }
}
We have a .onChange modifier to the Toggle element. What is it doing?
We’re checking whether filtersActive is active or not. If yes, we’re setting the deepARFilter from the filtersService to be applied using the viewModel (the CallViewModel handling call logic). If not, we’re setting the video filter to nil, effectively not applying any filter.
The last remaining thing to do is to add our FiltersPicker to the UI. Go to ContentView and first add the filtersService as a property at the top (remember that we’re already injecting it in the App file):
@ObservedObject var filtersService: FiltersService
Now, we can add the FiltersPicker. We’ll wrap the existing VStack in a ZStack with top alignment. Then, we render the FiltersPicker when the call is active.
Luckily, the callViewModel has a callingState property. Whenever this is in the .inCall state we render it. The updated body of ContentView looks like this:
ZStack(alignment: .top) {
    VStack {
        // Previous code goes here.
    }
    .padding()
    .modifier(CallModifier(viewModel: callViewModel))

    if callViewModel.callingState == .inCall {
        FiltersPicker(
            viewModel: callViewModel,
            filtersService: filtersService
        )
    }
}
Run the app now, and you’ll see our filters in action. Toggle the filtering and select the filter that you wish to apply.
Great job!
Summary
Let’s recap what we have done here. We have used the Stream Video SDK to create a basic video-calling app in just a few lines of code.
Then, we’ve used DeepAR to create effects and filters that we can apply to make the application more fun and expressive.
Last, we’ve hooked up a simple UI to intercept each video stream frame and apply the effects.
Of course, this is just the beginning, and we’re using very basic effects. You can explore creating your effects with DeepAR Studio. Let us know what awesome things you are building, and tag us on socials whenever you share your success.
Remember, you can get started with Stream Video for free or explore our video calling demo. Thanks for following this tutorial! The full code can be found here.